If you have VS2010 Premium or Ultimate [Professional corrected error in orginal post] you have code coverage built into the test system. When you look at your test results there is a button to see the code coverage
You would think that there is easy way to use the code coverage in your automated build process using Team Build 2010, well it can done but you have to do a bit of work.
What’s on the build box?
Firstly if your build PC has only an operating system and the Team Build Agent (with or without the Build Controller service) then stop here. This is enough to build many things but not to get code coverage. The only way to get code coverage to work is to have VS2010 Premium or Ultimate also installed on the build box.
Now there is some confusion in blog posts over if you install the Visual Studio 2010 Test Agents do you get code coverage, the answer for our purposes is no. The agents will allow remote code coverage in a Lab Environment via a Test Controller, but they do not provide the bits needs to allow code coverage to be run locally during a build/unit test cycle.
Do I have a .TestSettings file?
Code Coverage is managed using your solution’s .TestSetting file. My project did not have one of these, so I had to ‘add new item’ it via add on a right click in the solution items.
The reason I had no .TestSettings file was because I started with an empty solution and added projects to it, if you start with a project, such as a web application, and let the solution be created for you automatically then there should be a .TestSettings file created.
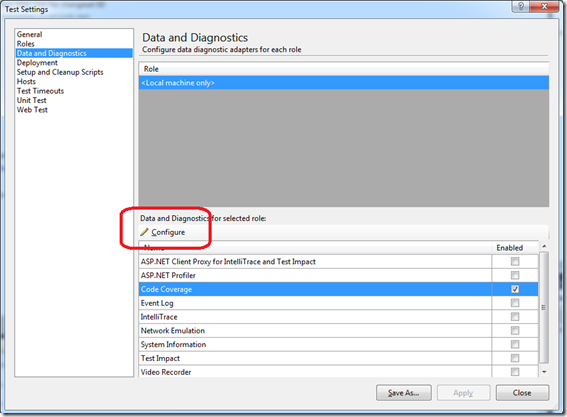
In the test settings you need to look at the Data & Diagnostics tab and enable code coverage and then press the configure button, this is important.
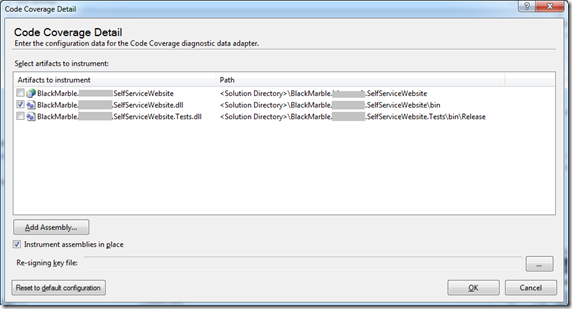
On the configuration dialog will see a list of your projects and assemblies. In my case initially I only saw the first and the last rows in the graphic below. I selected the first row, the project containing my production code and tried a build.
THIS DID NOT WORK – I had to added the actual production assembly as opposed to the web site project (the middle row shown below). I think this was the key step to getting it going.
The error I got before I did this was Empty results generated: none of the instrumented binary was used. Look at test run details for any instrumentation problems. So if you see this message in the build report check what assemblies are flagged for code coverage.
Does my build definition know about the .TestSettings file?
You now need to make sure that build knows the .TestSettings file exists. Again this should be done automatically when you create a build (if the file exists), but on my build I had to add it manually as I created the file after the build.
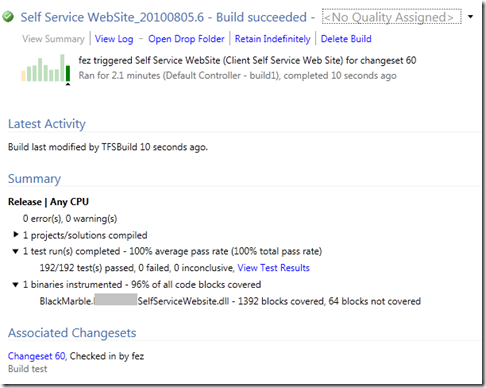
So when all this is done you get to see a build with test results and code coverage.
Easy wasn’t it!


