Since moving house a couple of years ago, I have gained an ever increasing set of apps on my phone to manage various things, such the Solaredge PV and battery system we installed and our Octopus Energy account, to name but two.
In the past, I had avoided IOT and the ‘Intelligent Home’ as I did not want to get to the point where ‘I can’t do the washing up, the Internet is down’. However, I recently got sent an Octopus Mini which meant for the first time I could get real time information from their API, so no longer needing to wait until my Smart Meter got around to transferring data to them, which could be up to 48 hours later.
So I thought it time to look at unifying the management of all these systems, and potentially automating some behaviors such as switching things on or off based the current cost of power and the performance of our PV/Battery system.
So enter Home Assistant, an OSS project I had heard very good things about, and I have to say lived up to the hype.
The installation was very easy, I used an old Intel NUC PC I had lying around.
Once running on my home network, Home Assistant automatically detected far more devices than I had expected. These included an LG TV, AudioCast devices, a old NetGear NAS, and a good few more. Very impressive, using only ‘standard device integrations’ shipped in the basic Home Assistant install, and no additional configuration by me.
Connecting to Octopus Energy and Solaredge took a bit more work as these integration were not shipped as standard.
First, I installed Home Assistant Community Store (HACS). This allows you to easily install any community Home Assistant add-in hosted GitHub. Once this was in place I could install community integration for Octopus Energy and Solaredge Modbus.
Note There is a Solaredge device integration shipped with Home Assistant, but it queries the Solaredge web-hosted API and not the local device, so any data is 15-30 minutes out of date. The community Modbus version queries the Solaredge inverter directly over Ethernet, so provides real time data. Much for useful if planning to do home automation based on current conditions.
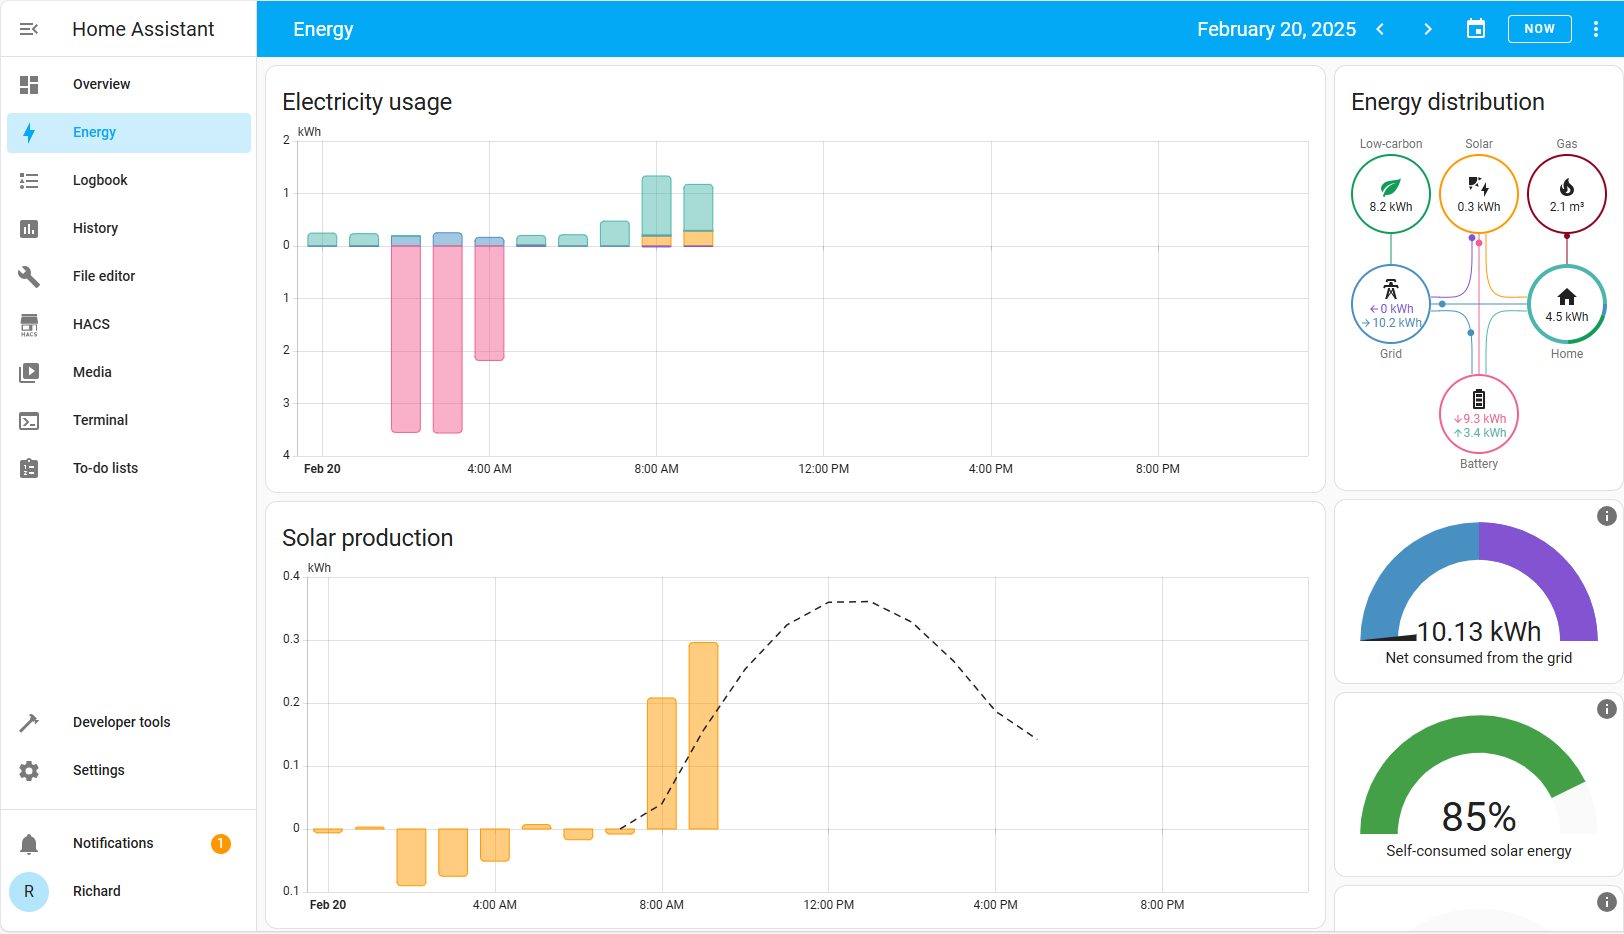
Again, this was all very easy, a few clicks and they were installed. The only complexity, where I had to do some reading and learning, was getting the correct data for Home Assistant Energy Dashboard (shown above). This was because the Solaredge Modbus integration provides a lot of low level raw data, but not all the values the Energy Dashboard needs.
However, as I was learning to expect for Home Assistant, the solution was well documented in the Solaredge Modbus integration GitHub Project WIKI. To use Sensor Templates to process the raw data to the forms needed. With hindsight, having to work my way though configuring this was an excellent way to learn Home Assistant better. I find it is always better to learn by trying to fix a problem you are experiencing, rather than just following tutorials
So, my Home Assistant is up and running. It is great to see such a successful and well documented OSS project with a large community of contributors. I am looking forward to seeing what else I can do with Home Assistant, but still fear I am on the slippery slope to being ‘unable to do the washing up due to an Internet outage’.