As part of our IT refresh we have decided to move this BlogEngine.NET server from a Hyper-V VM in our office to an Azure website.
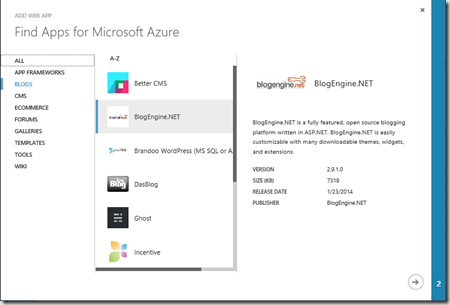
BlogEngine.NET is now a gallery item for Azure website, so a few clicks and your should be up and running.
However, if you want to use SQL as opposed to XML as the datastore you need to do a bit more work. This process is well documented in the video ‘Set BlogEngine.NET to use SQL provider in Azure’, but we found we needed to perform some extra steps due to where our DB was coming from.
Database Fixes
The main issue was that our on premises installation of BlogEngine.NET used a SQL 2012 availability group. This amongst other things, adds some extra settings that stop the ‘Deploy Database to Azure’ feature in SQL Management Studio from working. To address these issues I did the following:
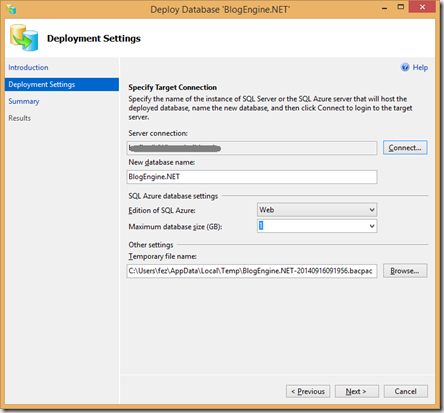
Took a SQL backup of the DB from our production server and restored it to a local SQL 2012 Standard edition. I then tried the Deploy to Azure
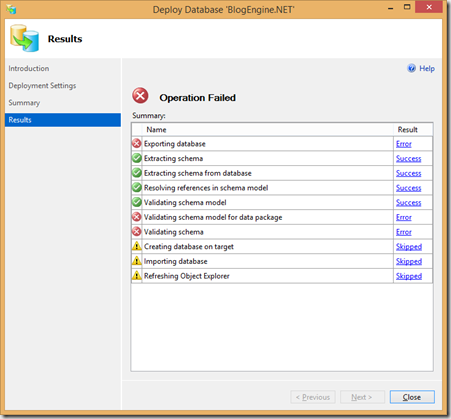
But got the errors I was expecting
There were three types
Error SQL71564: Element User: \[BLACKMARBLEAUser\] has an unsupported property AuthenticationType set and is not supported when used as part of a data package.
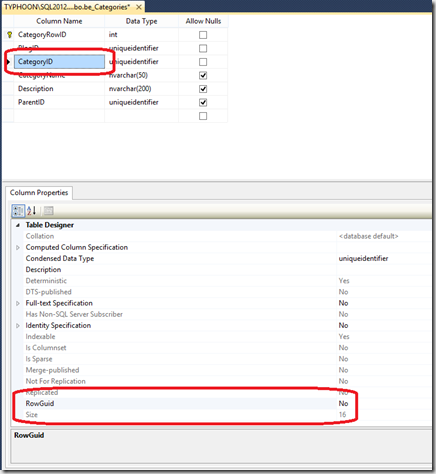
Error SQL71564: Element Column: \[dbo\].\[be\_Categories\].\[CategoryID\] has an unsupported property IsRowGuidColumn set and is not supported when used as part of a data package.
Error SQL71564: Table Table: \[dbo\].\[be\_CustomFields\] does not have a clustered index.  Clustered indexes are required for inserting data in this version of SQL Server.
The first fixed by simply deleting the listed users in SQL Management Studio or via the query
DROP USER \[BLACKMARBLEAuser\]
The second were addressed by removing the ‘IsRowGuidColumn’ property in Management Studio
or via the query
ALTER TABLE dbo.be\_Categories SET (LOCK\_ESCALATION = TABLE)
Finally II had to replace the non-cluster index with a cluster one. I got the required definition form the setup folder of our BlogEngine.NET installation, and ran the command
DROP INDEX \[idx\_be\_CustomType\_ObjectId\_BlogId\_Key\] ON \[dbo\].\[be\_CustomFields\]

CREATE CLUSTERED INDEX \[idx\_be\_CustomType\_ObjectId\_BlogId\_Key\] ON \[dbo\].\[be\_CustomFields\]
(
    \[CustomType\] ASC,
    \[ObjectId\] ASC,
    \[BlogId\] ASC,
    \[Key\] ASC
)
Once all this was done in Management Studio I could Deploy DB to Azure, so after a minute or two had a BlogEngine.NET DB on Azure
Azure SQL Login
The new DB did not have user accounts associated with it. So I had to create one
On the SQL server’s on Master DB I ran
CREATE LOGIN usrBlog WITH password='a\_password';
And then on the new DB I ran
CREATE USER usrBlog FROM LOGIN usrBlog ;
EXEC sp\_addrolemember N'db\_owner', usrBlog
Azure Website
At this point we could have created a new Azure website using the BlogEngine.NET template in the gallery. However, I chose to create an empty site as our version of BlogEngine.NET (3.x) is newer than the version in the Azure gallery (2.9).
Due to the history of our blog server we have a non-default structure, the BlogEngine.NET code is not in the root. We retain some folders with redirection to allow old URLs to still work. So via an FTP client we create the following structure, copying up the content from our on premises server
-
sitewwwroot - the root site, we have a redirect here to the blogs folder
-
sitewwwrootbm-bloggers – again a redirect to the blogs folder, dating back to our first shared blog
-
sitewwwrootblogs – our actual server, this needs to be a virtual application
Next I set the virtual application on the Configure section for the new website, right at the bottom, of the page
At this point I was back in line with the video, so need to link our web site to the DB. This is done using the link button on the Azure web site’s management page. I entered the new credentials for the new SQL DB and the DB and web site were linked. I could then get the connection string for the DB and enter it into the web.config.
Unlike in the video the only edit I need to make was to the connection string, as all the other edits had already been made for the on premises SQL
Once the revised web.config was uploaded the site started up, and you should be seeing it now


