SPDisposeCheck is a great tool for SharePoint developers to make sure that they are disposing of resources correctly. The problem is it is a bit slow to run, a problem as this will mean developers will tend not to run it as often as they should. A good solution to the problem is to run it as part of the continuous integration process. There is are posts on how to do this via unit tests and as a MSBuild task, but I wanted to use a TFS 2010 style build. Turns out this is reasonably straight forward without the need to write a custom activity.
- I created a build template based on the Default one.
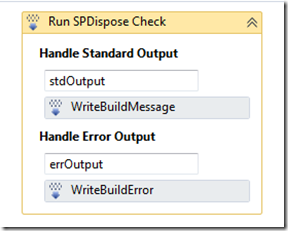
- After the compile and before the test step I added a InvokeProcess activity
-
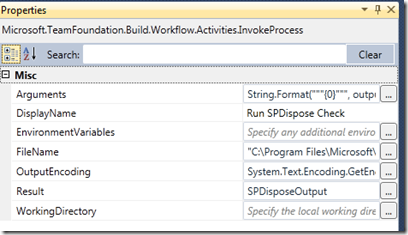
I set the InvokeProcess properties as shown below, the edited settings are
-
Arguments: String.Format(“””{0}””””, outputDirectory) (remember you need the enclosing “ if your path could have spaces in it)
-
Filename: To the location of the SPDisposeCheck.exe file
-
Result: A previously created build variable of type Int32
- I also dropped in some write message activities to make sure I got the console output in the build log file
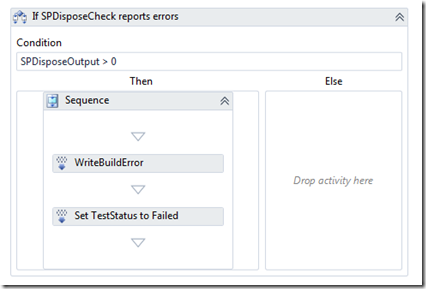
- SPDisposeCheck has a great feature that the number of errors is returned by the command line exe, so the InvokeProcess is able to store this in the SPDisposeOutput variable. We are able to use this fail the build
- This is done with a simple if check. If there are any errors found I write a build error message and set the TestStatus to failed. You might choose to set the build status to fail or any other flag you wish. The potential problem with my solution is that the TestStatus value could be reset by the tests that follow in the build process, but for a basic example of using the tool this is fine.
So it is easy to added a command line tool to the build. The key reason it is so easy is that SPDisposeCheck returns a number that we can use to see if the test passed or failed. hence we did not need to parse any text or XML results file. I wish more tools did this.


