A couple of months ago I wrote and published a custom activity for Team Build 2010 to allow Typemock tests to be run within the build process. Whilst setting up a new build need to use this activity so I though I would see if there was an easier way to use it in a build without all the branch and fuss required for development.
This is what I had to do
- Get the Zip file what contains all the source and binaries for the custom activity
- In your Team Project’s Source Control Explorer go to the BuildProcessTemplates folder. You should see (at least) the three standard templates: Default, Upgrade and Lab. Add the TypemockBuildProcessTemplate.xaml template from the SourceTypemockBuildActivity folder in the zip to the BuildProcessTemplates folder
- Under the BuildProcessTemplates folder create Custom Activities folder and into this add the TypemockBuildActivity.dll file from the root of the zip
- Check it all these added files
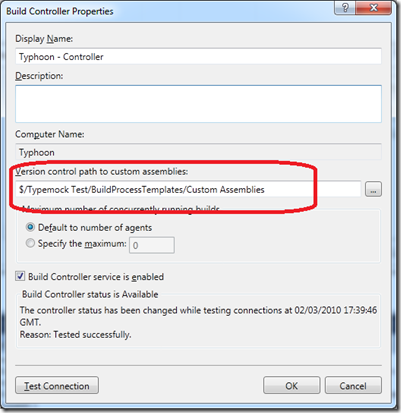
- On your Build Controller (login to the build PC and open the Team System Administration console) set its custom assemblies path to point to the folder where the custom activity DLL is stored
-
-
You can now edit an existing build, or create a new build, to make use of the new template. You should see the new template in the list of templates, if not just use the new template option then browser to find an existing template. It is up to you of you wish to use the original or make a copy
-
As the template takes the same options as the default template it can be used as direct replacement
-
AND THIS IS WHERE YOU HIT A PROBLEM
-
The process template in the zip has parameters set for the custom activity that were correct for the test harness used for development and the source control system it was mean to upload results to. Even for me, working on the same network, these are wrong for my new project. These parameters need to be edited.
-
Usually editing would be be done using the graphical build editing tool in Visual Studio. However as detailed in my original post, getting the custom assembly in a location so that it is correctly registered with Visual Studio involves some messy branching, and if this is not done you get error block in the graphical editor.
-
There is only one way I know how to avoid this and that is to do the editing in a text editor. The parameters that needed editing for me were
-
ProjectCollection – needs to point to the right TPC
-
TestRunnerExecutable – the location of the Typemock TMOCKRunner program as different on a 32bit PC to a 64bit build machine
-
You may need to edit more, but it is easy to see what is wrong if you try a build and look at the build log, all the parameters passed on the command line are listed, as well as any error messages.
-
Once I had completed my edits I checked the edited build template back into TFS
-
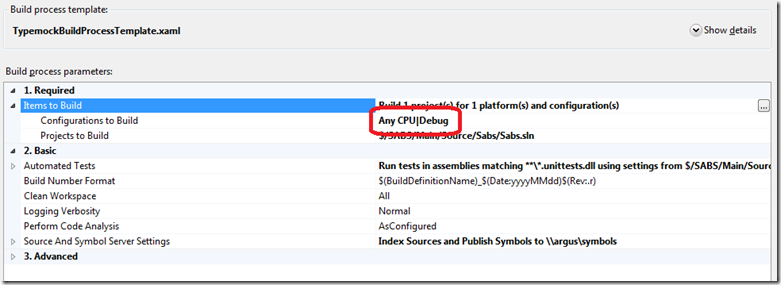
I had one further problem and that was MSTEST reported in the log that it could not run due to a missing /Platform parameter. The custom activity did not pass this parameter to MSTEST as in a default 2010 build it is not set. Once I explicitly set this my build (as shown below) it built, tests ran and results were published
-
Hope this post makes adoption of the activity a little easier for you

